First day cover ·
Compositing Parrots Into a Nature Scene with Pen Paths, Curves Masks and Ivy
A Photoshop compositing workflow for placing parrots into a nature scene, using pen-tool masks, split curves adjustments, and blurred ivy for depth.

Compositing animals into a photograph is less about cutting them out cleanly and more about making them share the same light. This tutorial builds a nature scene around parrots, and the useful part is the sequence: set up a canvas at print size, mask the subject with a pen path, then use separate curves layers to shape the light on each side of the bird. Foliage goes in last, softened so it reads as foreground rather than as a sticker.

Setting up the canvas
Start with a transparent document rather than a flat colour fill. Working on transparency lets you judge the edges of every element against the background as you add it, and it stops a stray white layer from hiding a mask problem. The tutorial uses a custom size of 3280 by 4100 pixels at 300 pixels per inch, in RGB 8-bit. At that resolution the file works out to roughly 10.9 by 13.7 inches at print size, which is a sensible target if you plan to output the image rather than only display it on screen.

Place the background photo with File > Place rather than opening it and copying across. A placed image stays a smart object, so you can rescale or replace it later without degrading the file.


A first Curves adjustment layer sits over the background at this stage, so the scene's tone is set before any bird arrives. That order matters. If you grade the background first, the parrot becomes the only element you have to match.


Cutting out the parrot with a pen path
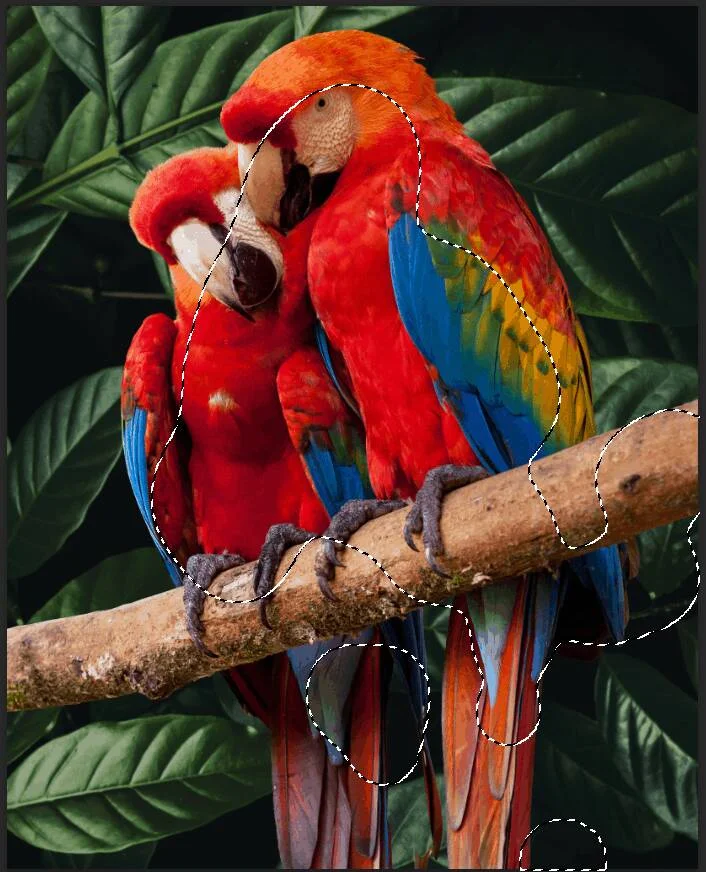
The parrot is the hardest part of the job. Feathers and fine edges are where a quick selection tool usually fails, so the tutorial uses the Pen tool (P) to trace a path around the bird. The key idea is that a pen path gives you clean, editable control points, and you can refine the outline by moving anchor points instead of re-selecting from scratch.
The mechanics are worth knowing if you haven't used the Pen tool recently. Click once to set an anchor point, with no dragging, and each further click adds a straight segment. The last anchor point you place shows as a solid square, and earlier anchors turn hollow as you go. To close the shape, click over the first hollow anchor. To leave it open, Ctrl-click (Windows) or Command-click (Mac) away from the objects, or switch tools.
- Use straight segments for the outline first, then add curve points only where the bird's silhouette needs them.
- Close the path before converting it to a selection, or the selection can come out incomplete.
- Right-click the path and choose Make Selection, then add a layer mask.
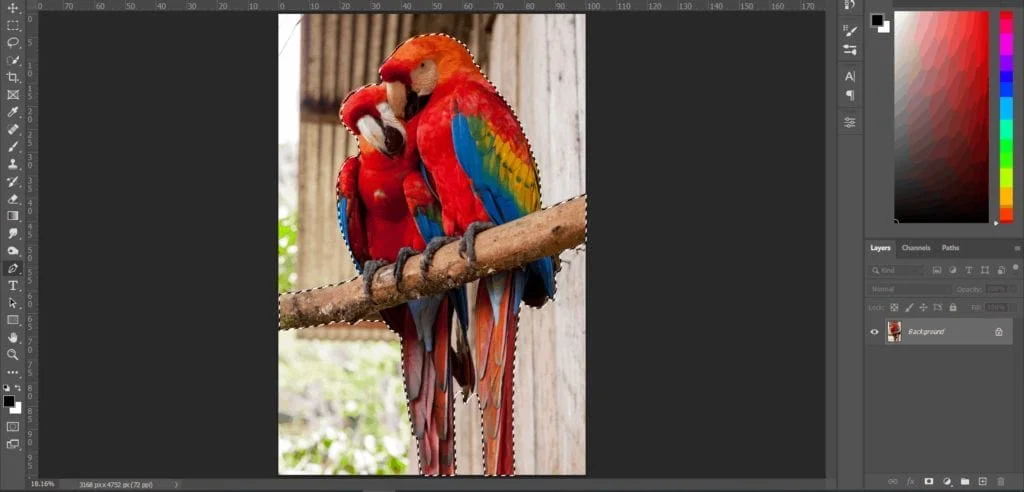
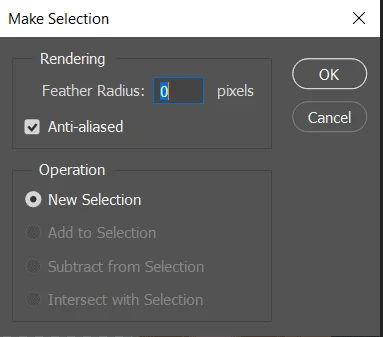
Set the selection's feather radius to 0px and keep Anti-aliased ticked. A hard, anti-aliased edge is what you want from a path. Feathering the selection at this stage would soften the outline before you have checked it against the background, and that usually shows up as a halo. Copy the cutout, paste it onto the working canvas, and position it with Free Transform (Ctrl/Cmd + T). Hold Alt while dragging a corner to scale from the centre, and add Shift if you need to keep the proportions locked. The source notes that current versions of Photoshop need only Alt for this, so check your own version's behaviour before you rely on the modifier combination.


Matching the light with split curves
A parrot cut out of one photograph and dropped into another rarely looks right on its own. The lighting direction, contrast and warmth usually disagree. The approach here is a pair of Curves adjustment layers, each masked to one side of the bird, so that you can darken or lift the two halves independently. That's a practical way to fake directional light when the source photos don't share it.
For the first curves layer on the parrot, invert its mask with Ctrl/Cmd + I so it starts fully hidden. Then paint with a soft round brush (B), foreground colour white, along the left side of the bird. Painting white on a mask reveals the adjustment only where you paint, so you're building the shadow or highlight in exactly the places you choose.
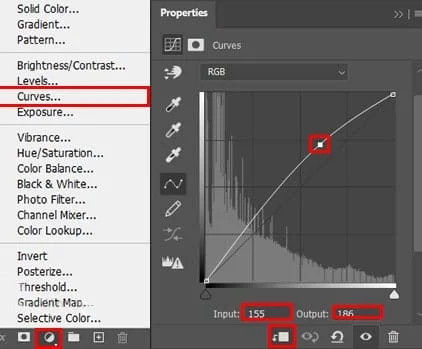

Repeat the process for the right side, this time with the layer opacity set to 80%. Dropping the opacity is a deliberate choice. A full-strength adjustment on the second side tends to flatten the bird, and the 80% setting keeps some of the original detail while still shifting the tone toward the scene's lighting.

A Hue/Saturation layer at 24% opacity finishes the colour match. Keep that value low. Parrot plumage is saturated to begin with, and pushing the saturation further tends to make a composite look like a graphic rather than a photograph.

Adding ivy for depth
The ivy stage is where the scene starts to feel like a place. Foliage in the foreground, slightly out of focus, does two jobs at once: it frames the parrot and it creates depth. The tutorial loads a selection from an ivy layer by Ctrl/Cmd-clicking its thumbnail, then copies and pastes it onto the canvas. Scaling and positioning follow the same Free Transform approach used for the parrot.
The blur is the step that does the real work. Go to Filter > Blur > Gaussian Blur and set the radius to 8px. Foreground leaves that sit between the camera and the subject should be softer than the bird, and that falloff in focus is what persuades the eye the foliage is closer to the lens. Apply the blur to foliage on the outer edges of the frame more than to the leaves beside the parrot, or the whole arrangement reads as one flat plane.
Where to take it next
The Camera Raw filter named at the start of the tutorial is the natural last pass. Once the parrot, light and foliage are in place, a raw-style global adjustment ties everything together in one pass: white balance, colour and overall contrast. Treat it as a finishing step rather than a fix, because it's far easier to judge the whole image once every element is in its final position.
The bigger lesson is the order of operations. Set the canvas and background first, then mask the subject precisely, then match light with separate, masked adjustments, and only then add the depth-building foliage. Each stage gives the next one a stable base. If you're building your own nature composites, the first thing to practise is the pen path, because a clean cutout makes every later adjustment easier to judge.